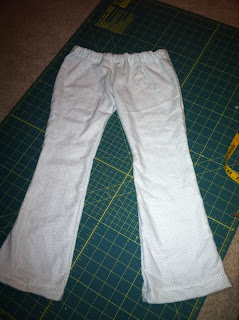
Saturday, June 2, 2012

So Incredibly Excited!

There are more than a few things going on around here which is why I haven’t posted anything lately. Also the fact that my sewing machine is “out of order” at the moment… A huge bummer, so I am trying to get that fixed this week or hopefully next. Until then I will probably be away from the blog for the most part but for now I thought I would share a few exciting things taking place in the near-ish future.

I remember -when I was very young -a huge (or to me it was huge) piano sitting in the dining room of my grandpa’s house, we weren’t allowed on it often and I never quite understood why… Regardless of that and the fact that I could not and still cannot play worth a penny, I grew very fond of this piano – It would soon hold some of the best memories of my childhood… It was one of the few things that was just “always there”, never changing, never moving… That is until my grandpa decided to retire and move. After he moved (not sure what year but it was somewhere around 2000), I had no idea where that piano went. I have always hoped it was still in the family somewhere but never counted on seeing it again. Well talking to my great aunt KC (my grandfathers sister) a few months ago I learned a lot more about that piano. Like the fact that it originally belonged to their mother, and it in fact WAS still in the family… Jump forward a few months and they have decided they can’t store it any longer and need to find a new home for it… Guess who was asked? THAT’S RIGHT! She asked me if I would like to have her mothers/or as I knew it-my grandpas piano! Absolutely, YES! So that is my very most exciting news…. Possibly ever. That thing means more to me than I even know how to express… Even more so now that my grandpa has passed on.

Next bit of exciting news, Serenity starts Kindergarten THIS September! I don’t know about you but September 3rd 2007 does not seem like it was that long ago. I remember so clearly the night/early morning that little girl decided to come into this world. *tear, sniffle sniffle* Yeah. yeah, yeah, they grow up… My babies aren’t supposed to grow up this fast though haha, can’t they be exempt???? Ok. Ok. Really though I am so excited but still a bit sad that she is growing up so quickly…

There could be another exciting thing (or maybe two) that I can’t quite post about until I know for sure if we want to go through with it… Lots more brainstorming and debating first. That is all I am saying about that. Well and I’ll tell all of you asking if it has anything to do with another baby, that is a negative. Not completely ruled out forever but for right now in our lives the two we have are perfect. :) Also – like I said to a friend- have you been to our house?! The two (lovely) girls we have now can be quite the handful ;) Currently Ren’s thing is telling destiny to do or get something after I have already told Ren no, and Destiny’s thing is climbing in the pantry to "get snacks" at all hours of the day - claiming that she is starving - when lord knows she's not (I think she eats more than serenity – Destiny is my foodie child) -I can't imagine what a third would bring into the mix, it could get a little scary haha.

So, that covers most of the updates for now. If you’re looking for a new project head over to Make It and Love It for a neat baby Bubble Romper tutorial. Or if you’re looking for a little something to spice up your home you can try this Decorative Satin Flower Pillow also by Make It and Love It, she says “I triple promise you that this will be the easiest/loveliest little satin flower pillow you will ever make.” What are you waiting for?? Go see if she’s right!

Saturday, April 28, 2012

New patterns!!

I just got FIVE new patterns from Violette Field Threads and I can't wait to test them out!

I got these five patterns:

Emmaline- a cute maxi dress                                     Elise- adorable shirt


Vivienne- beautiful skirt                                            Audrey- cute peasant dress


Chloe- party dress
*Tip* If you plan to buy more than one buy them in a bundle from their etsy store instead of their website. It's a little cheaper this way. :)

These patterns include very descriptive instructions, use words even I know ;) and they have a ton of pictures to reference too! I would say they definitely look user friendly!

You can count on a new post featuring one of these projects soon!


*Note* All pictures in this post are the property of Violette Field Threads. Please do not use without getting permission and giving proper credit where it is due.
Thank you!

Tuesday, April 17, 2012

Childrens Pajama Pants

I made these a couple weeks ago and JUST got around to posting this.... Yeah, I guess you can call me a slacker ;)
I just want to say this is one of my easier tutorials here. You will need fabric - the specific amount depends on your child's size and whether you are making pants or shorts (I made pants). Regardless, you will need enough for four "leg cut outs" (you can see what I mean below), a pair of pajama pants the same size or a size bigger to trace, and if you're doing this for a girl maybe a little piece of ribbon tied into a bow for the front of the waist band. Last, but definitely not least, elastic- enough to go around your child's waist.

To start, lay out your fabric and fold the pants you will be tracing in half, and trace them like this:
Picture From Simply Modern Mom
Apparently I didn't get as many pictures as I thought I did, please for give me. The picture above is from SimplyModernMom.com

Make sure to add a few inches to the top (we will be folding it over to create the casing for the elastic to go through later) about 2 ish inches should be fine *I used 3/4in elastic*. (I traced a regular pair of jeans and didn't add enough extra fabric to the top and ended up with a waist a bit lower than I like.... So just know this is the worst that can happen lol).
Now after you have traced and cut out your "quarter of the pants" four times (see the picture below) you can start sewing them together, going down the longest side of each. Make sure right sides are together, again see the pictures below...
Two of the 4 pieces - BTW I these are a size 5
I told you the waist was a bit short... Make
Sure you add those couple extra inches ;)
If you look closely you can see where I have sewn
down the right side (longest side) -now do this again
with the other two leg pieces
Instead of four quarters (four leg pieces) at this point you should have two pieces that look like the picture above.

Now you're ready to sew the shortest two seams - so open up each of the two leg pieces...
Unfortunately I didn't get a picture of this part either so I will substitute with this one from "My Cotton Creations"
Picture By My Cotton Creations
Imagine there is a seam down the middle of this (because that's what yours should look like), After you place your two pieces together like this you will be sewing the short curvy part ONLY. DO NOT sew down the legs yet and DO NOT sew the top.
Now fold this together so that both of those curvy pieces you have just sewn are touching...


You will see on yours that the insides of the legs aren't sewn together yet (this photo of mine they are - didn't get a picture of the before but you get the hint...) You will want to sew them together now. I sewed up one and right down the other so I didn't have to stop and go up the other leg and hope everything matched up etc.

All that's left at this point is hemming up the bottom of the legs, I folded them up twice so that I didn't have another raw edge *exactly why you'll need those extra couple inches*, and creating a casing for the elastic at the top.

The top of the pants I folded over about 1/4 inch and over again about an inch. You'll sew just at the bottom of this ALMOST all the way around. Leave about an inch opening to get your elastic through.


I suggest using a safety pin at the end of the
elastic to help pull it through.


Once you have pulled your elastic through, sew the ends together - Thought I had a picture of this too but I guess not. Basically you will pull on both ends and over lap them about 1/4-1/2 inch and do a zig-zag stitch to hold them together. Now you can close up the hole that you used to pull the elastic through.


TADA! Now you have pajama pants :D I had this piece of blue ribbon laying around that just happened to match, tied it in a bow and hand sewed it on. Perfect finishing touch!

Have you made pajama pants yet? Any ideas or suggestions? What should I do next? Please share in the comments section below!

Thursday, March 15, 2012

Moving and the Craziness That Follows...

I believe we have moved over a million times in the six and a half years Dustin and I have been together... Ok, that MAY be a LITTLE exaggerated..... Just a little though haha. So hopefully for the last time for a long while we started our new moving adventure last thursday. And what an adventure it has been too! So, if you've been wondering why there havent been many posts lately - here it is...

We had made the decision to move back in January but didn't really start looking around until february. Even after we really started looking we just couldnt seem to agree on anything, didnt exactly like much of anything we saw... Finally mid February we settled on an apartment in Oregon City, put a small down payment on it and put in our 30 day notice at our appartment. At this point you'd think we would be done looking, right? Wrong... I'm not sure what it was really, I guess just after really thinking it through we realized that wasn't exactly what we wanted. Not only have we wanted a yard for the girls literally forever but I realized, Serenity will be FIVE this year... That means she will be starting school this fall. Holy COW! And if I am going to be taking her to a school, I want to make sure it's a GOOD school. In the almost 5 years we've been in this area I have heard nothing BUT good things about the schools around here. I want Serenity to have the best possible school experience. I don't want to move her around a bunch, I don't want to send her to a school and just "hope" that it's a good school. I want to be confident about it. So, we decided to keep looking. It felt like we had been looking forever and everything kept falling through, we had already put a small down payment on the place in Oregon City and were starting to think that was going to have to be the one. After a lot of looking, a lot of places falling through and even more praying, I pulled up a place in listed just down the street that I had been missing, overlooking-whatever you want to call it, the whole time... Why havent I looked at this place?? It looks like it's big enough, has a small yard... So finally I open it up on the computer and it looks allright... We set up an appointment to come see it and the lady fell through but gave us the code to the lock box the key was in... (weird, we had never met her), we walked through and absolutely fell in love. It was the one we have been looking for all along.

*Seriously, to Dustin it's probably not such a big deal but for me it most definitely is a HUGE deal. I have ALWAYS wanted to live in a house with a tree out front that had pink flowers - When I was a kid my uncle had a house with a cherry tree out front and I LOVED it. This place even has a tree out front and guess what?! Little pink flowers are beginnning to blossom on it!*

I know, people don't decide on where to live based on wether or not there's a tree with pink flowers out front haha! It has a cute little back yard that isn't too small but isn't too big either, the perfect little tree out front, and everything we need on the inside... Where do we sign?! So we played phone tag with the lady that said she was leasing the place, finally turned in applicaations and were accepted - She asked when we wanted to move in and we told her that we really needed to move by the 10th at the latest... (this was MAYBE a week before the 10th...) So, she wasn't quite ready... I'm not sure we could have been more ready haha, we hadn't started moving and already wanted to be done with it! This lady gave us a date we could start moving in and by that date still didn't have the lease ready and everything else blah blah blah but told us we could move in anyway - Here's where Dustin started getting skeptical...( Is this a scam?! Why are we moving in before we have signed a lease?! Where is this lady?! )Eventually we did sign the lease, thank God, and everything started to settle down. It took forever to get moved in - this time without packing beforehand - I told you it's been an adventure :) - The first couple days of being here we had no heat (it's gas heating and Dustin forgot to call to have it turned on Friday lol) and the night before it gets turned on it decides to SNOW in MARCH! Thank god the guy was able to make it in the snow and we didn't freeze too much ;) We had our first snow ball fight in our new back yard that day and the girls had a blast!

Now we get to look forward to Destiny's 2nd birthday party here at our new home, I'm just not so sure about baking her cake/cupcakes (haven't decided) in a gas oven! I am a bit intimidated by the gas oven/stove haha! I am glad safeway is just down the street if I decide baking here is too much of a challenge LOL. I still just can't believe Destiny will be two... CRAZINESS.

I will be doing more "crafting" very soon- Just gotta get it all unpacked/organized first ;)

I think I may try this one very soon, the girls need more pajama pants that FIT... :)
http://www.danamadeit.com/2012/03/jammies-and-jammies.html

So until next time... <3

Tuesday, February 21, 2012

Lots-A-Ruffles!

I found this great post over at Ucreate with a ton of ruffle tutorials - Of course I had to go through and pick my favorites!

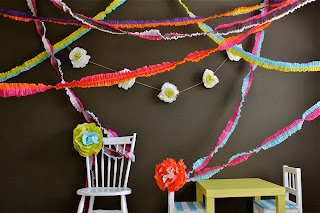
1. A fun party idea, ruffled streamers how-to, over at Dana Made It

Picture from danamadeit.com


2. I have always loved this douvet cover tutorial by Kiki Creates, one day I will over come my fear of making so many ruffles haha!

3. I would absolutely LOVE to recreate this Anthropologie shower curtain also done by Sister View

Picture from anthropologie.com


4. These ruffled curtains are adorable, over at Better Homes and Gardens

5. This fabric combination and ruffle dress tutorial over at iveyc95 is to die for!

Picture from iveyc95


6. Need a new tote bag? This ruffled tote tutorial posted over at Ucreate may be the one ;)

7. I have to make this cute ruffled rugby dress for my little miss! Tutorial posted over at Sumo's Sweet Stuff


8. From An Igloo posted this great tutorial on a ruffle tunic - Could also make a cute dress.

9. Last but definitely not least - A tutorial for you! A simple ruffled shirt tutorial over at Tea Rose Home

Of course these are only my favorites from the list over at Ucreate, so after you're done here go check out what else she has over there! Or if you're looking for more ruffles check out my Once Upon A Time ruffle skirt!

Sunday, February 19, 2012

Faux Under Shirt Tops....

I found this adorable tutorial over at Craftieness Is Not Optional and just had to share it with all of you! I love the layered look without all of the "bunchieness" from trying to get your kiddos to wear two shirts and a plus - they wont get too hot wearing them. :) Have a good week!

Monday, February 13, 2012

Spring Skirt Tutorial (Part 1)

Well, welcome back! It has taken much longer than I anticipated it would but I do finally have something for you! Raise your hand if, at some point, your life has been on an extremely crazy schedule..... Yep that's exactly what's going on over here haha. Though I promise you this skirt it's self doesn't take long at all, only the figuring out when to squeeze in time for it... Which I did from about eleven o' clock last night until about 12:15 and all I have left is to make / add pockets. If you're a more experienced sewer you could probably whip it out in half the time ;) I had to improvise a bit and that took some stopping and thinking and more stopping and thinking/revising original plans, not to mention I had no plans for this skirt- no tutorials - no sketches... etc. All completely out of my head at the last minute, which is pretty cool NOW that I think about it... Last night I found myself, asking myself, if I was nuts a few thousand times though.

Now to get started...

This is Baby Bella's skirt.
First of course you're going to need to pick out your fabric.... I knew I wanted to use a cute girly pattern and happened to have quite a bit of this sitting in one of the bunches of fabric my sister in law gave me a little while ago, perfect for the spring and I love the texture! **This tutorial is for about a 6-9 month skirt**

You will need-
Main fabric: cut at a slight angle (shown below)
24.5" long X 6.5" wide 
Top strip:
24.5" long X 2.5" wide (I had two 12.5" strips instead of one 24.5")
Bottom strip:
24.5" long X 4.5" wide(I had two 12.5" strips instead of one 24.5")
These measurements include 1/4 in. sewing allowance.
Elastic (1/2 inch) - I did not measure unfortunately, just kind of guessed... About 14.5 inches?
Iron - this is optional but does make it easier to keep things straight and lined up.

Getting started you will want to make sure you cut out all of your pieces so that they match up and you don't have to go back and do that later.

Take your "bottom strip" of fabric and fold it in half long ways....So that it is now 2 1/4" X 24.5". Iron it real quick for the best results - so you can keep it folded & straight. Now fold each of the edges of that (longways) toward the crease you just created. Kind of like this:


Once you have done that you can fold it back in half and start pinning it to the bottom of the "main fabric" and then sew.


**The seam you see in the picture is because my fabric was not long enough - I took two 12 1/2" long strips and sewed them together. If you need to do this also, I highly recommend doing it before you attach it to the skirt (like I have here) and line it up so that both seams will be on the sides of the skirt and not in the front and back.**

Once you have sewn the strip all the way across the bottom of the skirt its time to do the same for the top strip... When you are done with this your "skirt" should look like this (minus the pocket - that is a work in progress/idea at this point):

Take note, the sides are cut at an angle -
This is so the skirt flairs out slightly and doesn't fit too snugly around the legs.
Now you are ready to pull the elastic through the skirt. This is the fun part haha! Get a safety pin and attach it to the end of your elastic so you will have something to hold onto, then pull it through the "top strip"/ top white section. After this I sewed the ends of the elastic together *shown in the following image* - (you may have a better or easier way to do this - if you do PLEASE SHARE.... I am a total newbie to the sewing world haha.)


Again forgive my picture taking skills, :) this was taken before I trimmed the extra thread but you can see that I have sewn the elastic (ONLY) together.

Finally with the skirt inside out you will want to sew the edge of the skirt closed using a zig-zag stitch or a serger... I do not have a serger so I opted for a close zig-zag stitch. Now that I think about it I should have gotten a picture of that as well... Just make sure you do it really close to the edge - as close as possible without it going over the edge... If that makes sense? I will make sure to get a picture next time.

Now your skirt should look like this:


Now I just need to make and attach the pockets. I'm thinking something along the lines of the pocket shown above, I will post a mini tutorial on that too.

Until then, feel free to share if you have easier / better ways of accomplishing any of the steps in this tutorial, or if you have any questions at all - I would LOVE to read them!

XOXO

Saturday, February 4, 2012

A Little Something Extra...

Last week I had NO IDEA what to make for dinner because I completely forgot to thaw meat and desperately needed to go shopping... This happens quite often actually...The forgetting to thaw and plan dinner and in turn completely winging it- Nothing too new haha!

What do you do when you run into a situation like this??? OF COURSE! Breakfast for dinner! So, I was out of pancake mix, I usually use the blue bag/box, red writing.... Yeah that one... I'll remember what it's called I'm sure after I post this... Anyway, I really wanted to make breakfast because it's QUICK, EASY and always GOOD. So, I get on the internet and start looking for pancake recipes. Let me just tell you before we get any further here, the last two pancake recipes I tried were complete failures! As in, they made me decide the pancake mix from a box was the ONLY way to go.... Until this night.... It was getting later and later and again I was pretty desperate with not alot of options to choose from. Searching, searching, searching and DING! I found a pancake recipe and immediately pray that it turns out even a tinsy bit better than the last two.  (otherwise I'm SURE Dustin will never let me cook pancakes again haha!)

...cooking, cooking, cooking... and then comes the taste test.............. I believe I heard angels sing! Ok, ok, ok maybe not exactly but pretty darn close! This pancake recipe is not only BETTER than the last two, it is BETTER than the pancake mix in a box!!!! This will now be referred to as my very favorite pancake recipe EVER. Yes, it is THAT good.... Even better, the whole family loved it too!

Here is the new famous pancake recipe:
You will need:
2 cups all-purpose flour
2 1/2 teaspoons baking powder
3 tablespoons brown sugar
1/2 teaspoon of salt
2 large eggs
1 1/2 to 1 3/4 cups of milk
2 tablespoons of melted butter
2 teaspoons of cinnamon (or to your liking)
2 teaspoons of vanilla (or to your liking)

Instructions:
In one bowl mix (with a whisk) baking powder, sugar, cinnamon and salt. In a separate bowl whisk together the eggs and 1 1/2 cups of milk, then slowly mix this into the flour mixture until smooth. Blend in the melted butter and vanilla. Finally cook how you would normally cook regular pancakes... Cover in delicious maple syrup, or eat plain - both have been tested here and either way these pancakes ROCK!

**side note: if you have bacon - BAKE it instead of frying it - SOOO much better!** :)

Getting Caught Up

Totally got behind here, it has been one heck of a week! I will start with last week.... I got a call saying I was hired (as a temp. for now) for a great company out here entering bills - it's the night shift so that I am still able to be at home with my girls during the day... Not sure it gets any better than that! So I started this last Monday and unfortunately haven't had much time for crafting.... Or anything else aside from household chores for that matter haha. I am now getting caught up! That is a promise! ;)

So, that being said... I HOPE to have something knocked out and ready to post for you guys by Monday when I go back to work. :) For now here's one of my current favorite tutorials...

Becky from Ucreate has posted this wonderful notebook folder tutorial over at Riley Blake Designs:
All photos courtesy of Ucreate


Monday, January 16, 2012

Learning to crochet?

I have gotten a bit behind with everything happening all at once around here but I shal have a new project for you very soon! I received a few crochet hooks, yarn and tutorials on "how to crochet" this Christmas, so of course I had to remember a blog I stumbled upon a few moths ago.... :) I think THIS baby blanket is absolutely ADORABLE! So I decided it is going to be my first crocheting project.... I am getting the tutorial at Tales From Cuckoo Land.

Well, my very first crocheting "project" was when I was a kid - I would make "friendship bracelets" using just a basic chain stitch haha but that was as complicated as it got for me...

Hopefully in the next few days I will have SOMETHING to show you all. ;)

Until then, here are a few of my favorite crafty blogs:

Check them out, have fun and most importantly... STAY TUNED ;)

* PS. If you have or plan to make this blanket as well, please do share!

Tuesday, January 10, 2012

My First Dress - Tutorial

Last Wednesday I told you all a little about the first dress I made and promised to figure out where I found the tutorial... Just when I thought I had lost the tutorial for good and there was no hope in finding it ever again... Guess what?! Yep, I found it. Haha, nothing is impossible. ;)
I found this tutorial over at Craftiness Is Not Optional, and it was actually a guest post from Little Big Girl Studio. At the time I just wanted to finally MAKE something with my new sewing machine (that I so cleverly wrecked the tension on... hehe... My last post explains this.), and of course I wanted it to be somewhat simple, cute, not intimidating... This "peasant dress"/MiniBoden knock-off seemed to fit the bill, and would have been easy enough had I not messed up all of my tension settings before hand... So before we start... Fix your tension settings!... Or if you've never touched them before - DON'T touch them. ;)

Now, before we go much further, I want to make it clear that I used this tutorial MOSTLY just for the fabric cutouts/basic instruction and winged it from there. Being fairly new to the sewing world I wasn't comfortable using quite the same technique she did with the elastic thread and opted to use elastic in a casing instead - which I will try my best to explain.

Also, this is for a size 2T dress. If your child is smaller/bigger you may want to research how much bigger your fabric needs to be because I haven't quite mastered all of that...


Basically I followed all of her instructions only making these "tweaks":
I had no fabric marking pen - I used white chalk instead
I had no elastic thread - I used elastic instead
I had no Hem Gauge - I winged my hem :)
I added ribbon and buttons

If you use elastic like I did you may want to add about an inch to your skirt length so that you can fold that over *toward the "wrong side"* 1/4in and then again an inch to create a "tunnel", or whatever you want to call it, for your elastic to go through. Sew close to the edge you folded twice, leaving about an inch open to string the elastic through. AND THEN follow her instructions on how to attach the skirt to the top. *trying not to sew over the elastic*

Before I created the "tunnel" for the elastic I added two button holes to the front of the skirt so that I could attach ribbon to the ends of my elastic and tie them together (making it easier to adjust on her) instead of having just elastic on the inside of the dress... I also thought it would be a cute addition. If you also decide to do this - you don't have to worry about leaving an inch of the casing open because you will string your elastic through one button hole and out the other.

For the elastic I used enough to go around my daughters waist ONLY 2/3 of the way... then added the ribbon to each end (sewing it on with a zigzag stitch).

For the elastic in the neck area she explains pretty well how to make that happen in step 6 of this tutorial.


I hope I didn't make this sound too difficult, it really isn't. If you have any questions, feel free to post them in the comment section below and I will try to answer them as best as I can, if I don't know the answer I will find it for you. Sorry also for the lack of explanatory photos, I had no idea at the time that I would be blogging about it. :)

Wednesday, January 4, 2012

My First Dress

...Well the first dress I've ever made...

I don't remember where or how I got my hands on the tutorial for this dress - I just spent an hour searching my computer AND the internet for something close/something that looked familiar.... and NOTHING... So I will add that to my list of things to keep looking for (haha) or perhaps I will break down and bring the dress out to examine what exactly it was that I did and create a tutorial from there... But for now, here are some pictures:


Please do keep in mind, this was only my second project, so I couldn't sew a straight line for my life! And to top that off, I was having terrible issues with my threading tension *because as soon as I got my machine I had to touch every knob, button, switch on my machine - :( including the bobbin tension (what was I thinking?!!!) Though luckily you cant see all of the imperfections in these pictures (thanks to horrible lighting and all the gathering hehe). And it isn't the WORST second sewing project ever... Right?? LOL.

I was just happy she could actually wear it! Haha

Basically this dress is about three pieces of fabric. The top/back w/sleeves, the top/front, and the "skirt"... Wait plus the pockets - so that's really a couple more pieces isn't it? Ok, I PROMISE I will get a real tutorial up in the next month or so, let me just figure out where I put it. ;)