Tuesday, February 21, 2012

Lots-A-Ruffles!

I found this great post over at Ucreate with a ton of ruffle tutorials - Of course I had to go through and pick my favorites!

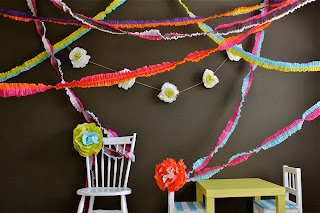
1. A fun party idea, ruffled streamers how-to, over at Dana Made It

Picture from danamadeit.com


2. I have always loved this douvet cover tutorial by Kiki Creates, one day I will over come my fear of making so many ruffles haha!

3. I would absolutely LOVE to recreate this Anthropologie shower curtain also done by Sister View

Picture from anthropologie.com


4. These ruffled curtains are adorable, over at Better Homes and Gardens

5. This fabric combination and ruffle dress tutorial over at iveyc95 is to die for!

Picture from iveyc95


6. Need a new tote bag? This ruffled tote tutorial posted over at Ucreate may be the one ;)

7. I have to make this cute ruffled rugby dress for my little miss! Tutorial posted over at Sumo's Sweet Stuff


8. From An Igloo posted this great tutorial on a ruffle tunic - Could also make a cute dress.

9. Last but definitely not least - A tutorial for you! A simple ruffled shirt tutorial over at Tea Rose Home

Of course these are only my favorites from the list over at Ucreate, so after you're done here go check out what else she has over there! Or if you're looking for more ruffles check out my Once Upon A Time ruffle skirt!

Sunday, February 19, 2012

Faux Under Shirt Tops....

I found this adorable tutorial over at Craftieness Is Not Optional and just had to share it with all of you! I love the layered look without all of the "bunchieness" from trying to get your kiddos to wear two shirts and a plus - they wont get too hot wearing them. :) Have a good week!

Monday, February 13, 2012

Spring Skirt Tutorial (Part 1)

Well, welcome back! It has taken much longer than I anticipated it would but I do finally have something for you! Raise your hand if, at some point, your life has been on an extremely crazy schedule..... Yep that's exactly what's going on over here haha. Though I promise you this skirt it's self doesn't take long at all, only the figuring out when to squeeze in time for it... Which I did from about eleven o' clock last night until about 12:15 and all I have left is to make / add pockets. If you're a more experienced sewer you could probably whip it out in half the time ;) I had to improvise a bit and that took some stopping and thinking and more stopping and thinking/revising original plans, not to mention I had no plans for this skirt- no tutorials - no sketches... etc. All completely out of my head at the last minute, which is pretty cool NOW that I think about it... Last night I found myself, asking myself, if I was nuts a few thousand times though.

Now to get started...

This is Baby Bella's skirt.
First of course you're going to need to pick out your fabric.... I knew I wanted to use a cute girly pattern and happened to have quite a bit of this sitting in one of the bunches of fabric my sister in law gave me a little while ago, perfect for the spring and I love the texture! **This tutorial is for about a 6-9 month skirt**

You will need-
Main fabric: cut at a slight angle (shown below)
24.5" long X 6.5" wide 
Top strip:
24.5" long X 2.5" wide (I had two 12.5" strips instead of one 24.5")
Bottom strip:
24.5" long X 4.5" wide(I had two 12.5" strips instead of one 24.5")
These measurements include 1/4 in. sewing allowance.
Elastic (1/2 inch) - I did not measure unfortunately, just kind of guessed... About 14.5 inches?
Iron - this is optional but does make it easier to keep things straight and lined up.

Getting started you will want to make sure you cut out all of your pieces so that they match up and you don't have to go back and do that later.

Take your "bottom strip" of fabric and fold it in half long ways....So that it is now 2 1/4" X 24.5". Iron it real quick for the best results - so you can keep it folded & straight. Now fold each of the edges of that (longways) toward the crease you just created. Kind of like this:


Once you have done that you can fold it back in half and start pinning it to the bottom of the "main fabric" and then sew.


**The seam you see in the picture is because my fabric was not long enough - I took two 12 1/2" long strips and sewed them together. If you need to do this also, I highly recommend doing it before you attach it to the skirt (like I have here) and line it up so that both seams will be on the sides of the skirt and not in the front and back.**

Once you have sewn the strip all the way across the bottom of the skirt its time to do the same for the top strip... When you are done with this your "skirt" should look like this (minus the pocket - that is a work in progress/idea at this point):

Take note, the sides are cut at an angle -
This is so the skirt flairs out slightly and doesn't fit too snugly around the legs.
Now you are ready to pull the elastic through the skirt. This is the fun part haha! Get a safety pin and attach it to the end of your elastic so you will have something to hold onto, then pull it through the "top strip"/ top white section. After this I sewed the ends of the elastic together *shown in the following image* - (you may have a better or easier way to do this - if you do PLEASE SHARE.... I am a total newbie to the sewing world haha.)


Again forgive my picture taking skills, :) this was taken before I trimmed the extra thread but you can see that I have sewn the elastic (ONLY) together.

Finally with the skirt inside out you will want to sew the edge of the skirt closed using a zig-zag stitch or a serger... I do not have a serger so I opted for a close zig-zag stitch. Now that I think about it I should have gotten a picture of that as well... Just make sure you do it really close to the edge - as close as possible without it going over the edge... If that makes sense? I will make sure to get a picture next time.

Now your skirt should look like this:


Now I just need to make and attach the pockets. I'm thinking something along the lines of the pocket shown above, I will post a mini tutorial on that too.

Until then, feel free to share if you have easier / better ways of accomplishing any of the steps in this tutorial, or if you have any questions at all - I would LOVE to read them!

XOXO
Saturday, February 4, 2012

A Little Something Extra...

Last week I had NO IDEA what to make for dinner because I completely forgot to thaw meat and desperately needed to go shopping... This happens quite often actually...The forgetting to thaw and plan dinner and in turn completely winging it- Nothing too new haha!

What do you do when you run into a situation like this??? OF COURSE! Breakfast for dinner! So, I was out of pancake mix, I usually use the blue bag/box, red writing.... Yeah that one... I'll remember what it's called I'm sure after I post this... Anyway, I really wanted to make breakfast because it's QUICK, EASY and always GOOD. So, I get on the internet and start looking for pancake recipes. Let me just tell you before we get any further here, the last two pancake recipes I tried were complete failures! As in, they made me decide the pancake mix from a box was the ONLY way to go.... Until this night.... It was getting later and later and again I was pretty desperate with not alot of options to choose from. Searching, searching, searching and DING! I found a pancake recipe and immediately pray that it turns out even a tinsy bit better than the last two.  (otherwise I'm SURE Dustin will never let me cook pancakes again haha!)

...cooking, cooking, cooking... and then comes the taste test.............. I believe I heard angels sing! Ok, ok, ok maybe not exactly but pretty darn close! This pancake recipe is not only BETTER than the last two, it is BETTER than the pancake mix in a box!!!! This will now be referred to as my very favorite pancake recipe EVER. Yes, it is THAT good.... Even better, the whole family loved it too!

Here is the new famous pancake recipe:
You will need:
2 cups all-purpose flour
2 1/2 teaspoons baking powder
3 tablespoons brown sugar
1/2 teaspoon of salt
2 large eggs
1 1/2 to 1 3/4 cups of milk
2 tablespoons of melted butter
2 teaspoons of cinnamon (or to your liking)
2 teaspoons of vanilla (or to your liking)

Instructions:
In one bowl mix (with a whisk) baking powder, sugar, cinnamon and salt. In a separate bowl whisk together the eggs and 1 1/2 cups of milk, then slowly mix this into the flour mixture until smooth. Blend in the melted butter and vanilla. Finally cook how you would normally cook regular pancakes... Cover in delicious maple syrup, or eat plain - both have been tested here and either way these pancakes ROCK!

**side note: if you have bacon - BAKE it instead of frying it - SOOO much better!** :)

Getting Caught Up

Totally got behind here, it has been one heck of a week! I will start with last week.... I got a call saying I was hired (as a temp. for now) for a great company out here entering bills - it's the night shift so that I am still able to be at home with my girls during the day... Not sure it gets any better than that! So I started this last Monday and unfortunately haven't had much time for crafting.... Or anything else aside from household chores for that matter haha. I am now getting caught up! That is a promise! ;)

So, that being said... I HOPE to have something knocked out and ready to post for you guys by Monday when I go back to work. :) For now here's one of my current favorite tutorials...

Becky from Ucreate has posted this wonderful notebook folder tutorial over at Riley Blake Designs:
All photos courtesy of Ucreate